|

Custom Search
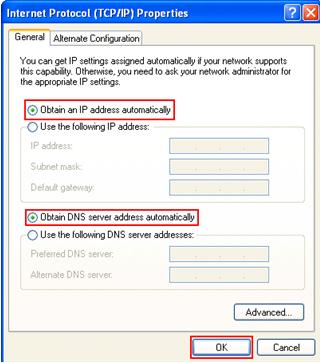
Internet Connection Sharing – ICS Client Computer SetupThis article will explain how to configure client computer to use ICS (Internet Connection Sharing) to access Internet. There are 3 methods available to configure ICS client computer, which are DHCP setup, manual setup and network setup wizard. DHCP SetupThis is the easiest way to set up client computer. It works on all versions of Windows OS. What you need to do is to configure TCP/IP on local area connection to obtain an IP address automatically on client computer. The computer will be assigned IP 192.168.0.x and other network information from ICS host computer automatically.
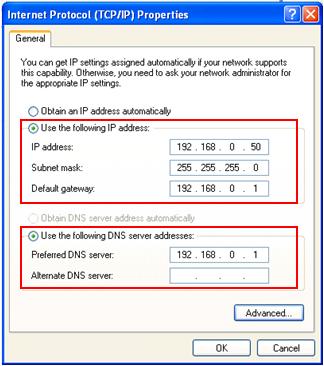
Manual SetupIf you want to do manual TCP/IP setup on client computers, use this network parameters to set them up. It works… IP Address: Any IP address from 192.168.0.2-254
Here is an example:
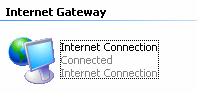
Network Setup WizardHow to monitor and manage your shared Internet connection from a client computer? You won’t be able to control shared Internet connection if you use DHCP or manual setup method. Answer is you need to use Network Setup Wizard to install the Internet Connection Sharing Discovery and Control on client computer. Not too sure how to install? Check out here to learn how to configure client computer by using Network Setup Wizard. There is new Internet Connection icon created in Network Connections window after installing the control on client computer. Same as DHCP setup, the client computer will be assigned IP 192.168.0.x and other network information automatically.
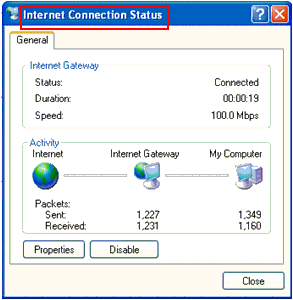
Right click Internet Connection and click Status, you would then be able to monitor the connection status and enable/disable shared Internet connection.
Related Readings: Internet Connection Sharing in Windows XP
|