|
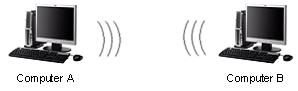
How to Connect Two Computers Wireless in Windows 7Let's discuss about how to connect two computers wireless in Windows 7 here! Once you have this set up, you can connect this Windows 7 computer to other computer without using network cable, and it’s also called ad hoc wireless network.
However, if your computer is not equipped with wireless adapter, you can check out this how to connect two computers directly by using crossover cable article. OK! let’s create a simple network by assigning following network info to each computer's wireless adapter (you don’t need to configure gateway and DNS servers): Computer A: IP Address: 10.1.1.1
Computer B: IP Address: 10.1.1.2
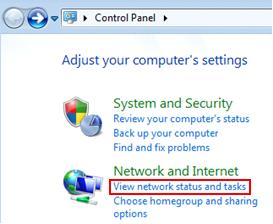
Note: If you have Internet Connection Sharing enabled on one of the computers, you can just set the other computer to obtain an IP address automatically, later that computer will be able to access Internet once the ad hoc wireless network is up. If you don't quite know how to configure computer to obtain IP address automatically, check out this configure IP article to learn more. In order to connect two computers, now you need to configure ad hoc wireless setting on Windows 7 computer A, so that computer B can connect to it wireless, after that can proceed to share file or printer. On Windows 7 Computer A: 1) Go to Start and click on Control Panel. 2) Proceed to click View network status and tasks in Control Panel window.
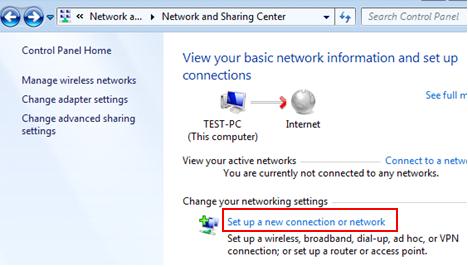
3) Network and Sharing Center window will appear, proceed to click on Set up a new connection or network.
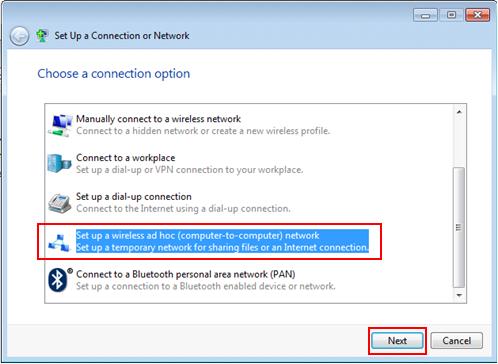
4) Set Up a Connection or Network window will appear, select Set up a wireless ad hoc (computer-to-computer) network option and click Next.
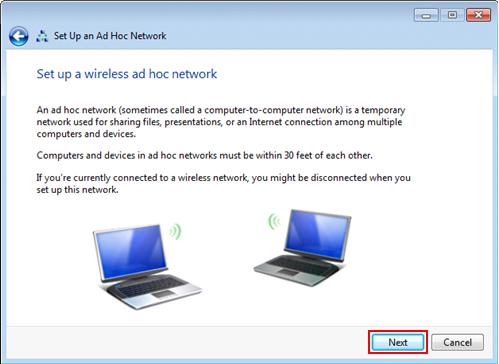
5) You will see some explanation on this wireless ad hoc network. Please note that both computers must be within 30 feet of each other in order to connect successfully! Click Next.
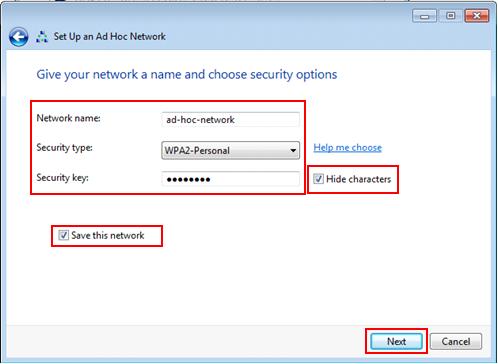
6) Here you need to fill up the details of this ad hoc network. Name your network, select security type and set security key if needed. Click Save this network option too, so that can manage it later. Click Next. Note: Although you can choose No authentication (open), WEP and WPA2-Personal as security type, but I advise you to use WPA2-Personal as this is the most secure security type.
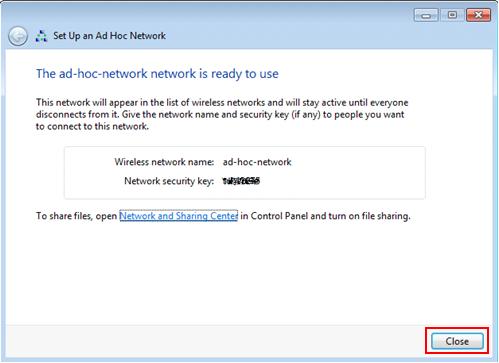
7) A window will be shown to tell you that the ad hoc wireless network is in the creation process. Finally this window will show you the created ad hoc wireless network with name and security key info, and this info is needed for other computers to connect to this ad hoc network. Bingo! You have done!
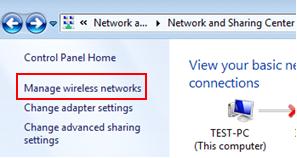
Note: You can always go back to Network and Sharing Center window, and click on manage wireless networks option to further manage this ad hoc wireless network.
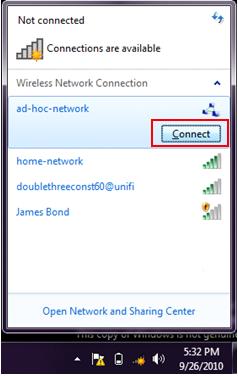
8) Let’s move to computer B, search for available ad hoc wireless network and connect to it.
9) Once the connection is established, you are prompted to select network location type and/or homegroup on computer A. I will usually select Home network as network location type as the other connected computer is trusted computer. It's ok if you do not want to create homegroup. At this point, you should be able to connect two computers and ping the other connected computer, finally proceed to share files if you like. Other Articles: Simple File Sharing in Windows 7
|