How to Connect to Wireless Network Manually in Windows 10
How to connect to wireless network manually in Windows 10? You can find it out in this article.As you know connecting to wireless network manually is required sometimes especially when your computer fail to scan and detect certain wireless network (such as hidden wireless network) that you want to connect to or you got problem to connect to a particular wireless network automatically.
1) Click the network icon on lower right corner of task bar area in order to show wireless network or other network information, and go ahead to click on the Network settings.
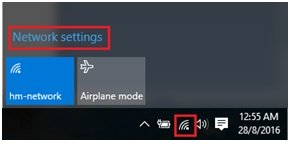
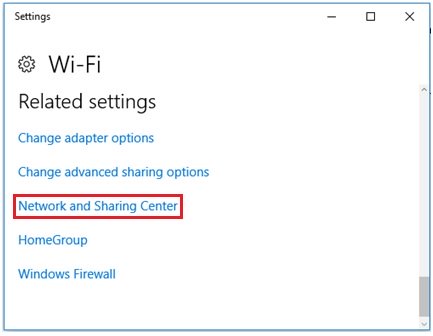
Note: You can also come to this window with this way: Go to Start->Settings->Network & Internet->WiFi->click on Network and Sharing Center
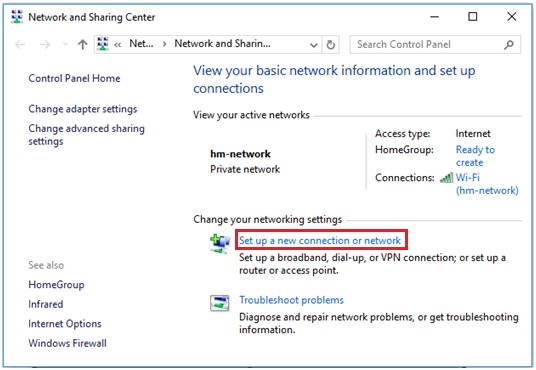
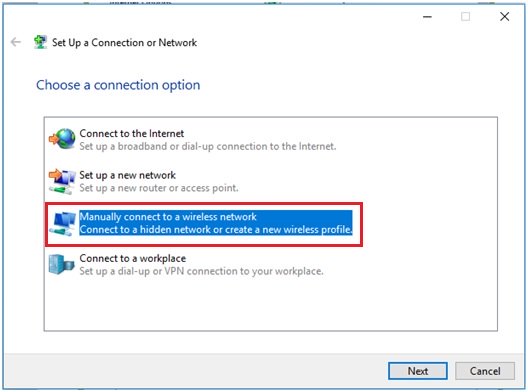
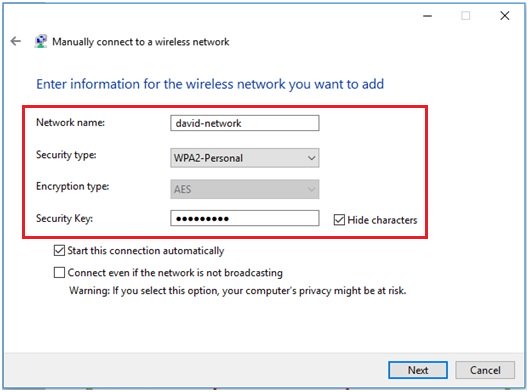
The supported security types are No authentication (Open), WEP, WPA2-Personal, WPA2-Enterprise and 802.1x.
Note: Tick on Start this connection automatically option if you want it to connect to this wireless network automatically next time when it’s in connecting range.
Note: You can also tick on Connect even if the network is not broadcasting option if you trust this wireless network.
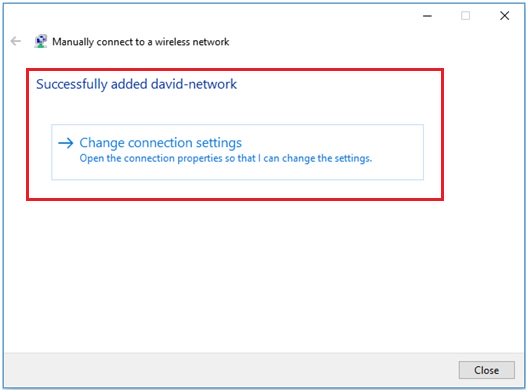
You can also change the wireless network connection settings again by clicking on Change connection settings, else you can change the settings in manage known networks window later.
Recommended Articles:
Free Wireless Key Finder – WirelessKeyView
Free Public DNS Servers from Google
Website Scanning Online for Safe Web Browsing
Return to top of "How to Connect to Wireless Network Manually in Windows 10"!!


